
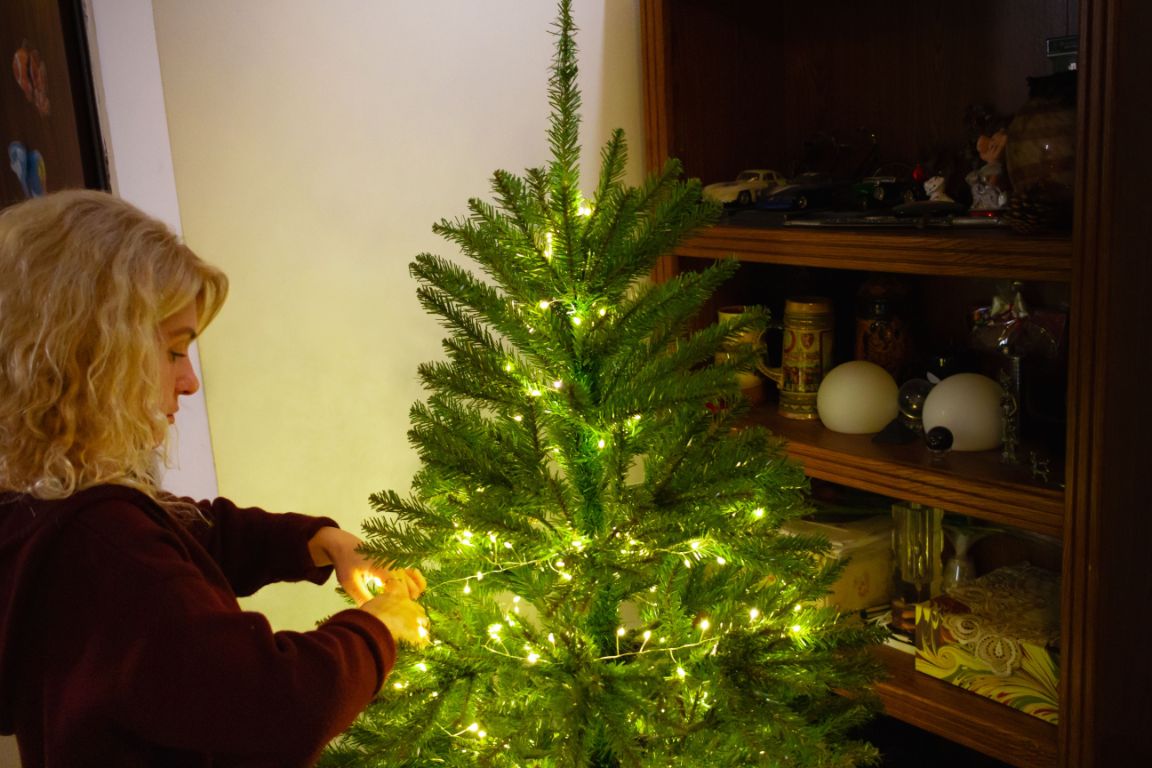
Wrapping a Christmas tree with lights looks simple until you start. One side ends up brighter, another side has gaps, and somehow half the wire is visible from across the room.
The easiest way to get a balanced result is to treat the tree in sections and build the lighting in layers instead of wrapping one tight spiral around the outside.
This guide covers the main methods for wrapping a Christmas tree with lights, including horizontal wrapping, vertical installation, and deeper branch layering.
Before You Start: Test Every Light String
Test all of your lights before putting them on the tree.
Check for:
- Dead sections
- Damaged wires
- Loose connections
- Broken bulbs
- Mismatched light colors
It is much easier to replace a faulty string before ornaments and ribbon are already installed.
Decide How Many Lights You Need
Before wrapping the tree, estimate your total light count.
A useful starting point for standard mini lights is roughly:
- 75 lights per foot for lighter coverage
- 100–125 lights per foot for balanced coverage
- 150+ lights per foot for a brighter tree
Tree width and branch density can change that significantly.
You can use our Christmas tree light calculator for a more tailored estimate.
Choose Your Wrapping Method
There are three practical ways to install Christmas tree lights:
- Horizontal wrapping
- Vertical lighting
- Layered branch lighting
You can also combine methods.
Method 1: Horizontal Wrapping
Horizontal wrapping is the traditional method.
You start at the bottom of the tree and work upward in a spiral.
How to Do It
- Start near the bottom of the tree close to the power source.
- Move around the tree gradually.
- Keep each layer reasonably even.
- Push some sections deeper into the branches.
- Bring other sections closer to the tips.
- Continue upward until you reach the top.
Avoid creating perfectly visible rings of lights around the tree. Vary the depth slightly so the lighting feels more natural.
Advantages of Horizontal Wrapping
- Easy to understand
- Works on almost any tree shape
- Good for traditional string lights
- Simple to adjust as you go
Disadvantages of Horizontal Wrapping
- Removal can take longer
- It is easy to create obvious horizontal bands
- Uneven spacing can become visible
Method 2: Vertical Christmas Tree Lights
Vertical lighting runs the string from the top toward the bottom in sections rather than wrapping continuously around the tree.
This method has become popular because it can be easier to adjust and remove.
How to Install Lights Vertically
- Start near the top of the tree.
- Run the string downward toward the base.
- Move sideways slightly.
- Run the string back toward the top.
- Repeat around the tree.
The result is a series of vertical light sections distributed around the branches.
Advantages of Vertical Lighting
- Easy to remove after Christmas
- Individual sections are easier to reposition
- Good for identifying dark areas
- Works well on tall trees
Disadvantages of Vertical Lighting
If the vertical runs are spaced too evenly, they can become visually obvious.
Weave sections slightly left and right through the branches to keep the pattern from looking too rigid.
Method 3: Layer Lights Through the Branches
Layered lighting creates the most depth.
Instead of treating the tree as a flat outer surface, place lights at different distances from the trunk.
Use three general zones:
- Inner branches near the trunk
- Middle branch area
- Outer branch tips
This creates the appearance that the tree is glowing from inside.
Why Deep Lighting Looks Better
If every bulb sits on the outer branches, the tree can look flat.
Placing some lights deeper inside helps:
- Create visual depth
- Reduce dark gaps
- Light ornaments from behind
- Make the tree appear fuller
You may need more lights when using this method because some bulbs are partially hidden.
Where Should You Start?
If the outlet is near the floor, starting at the bottom is usually easiest.
If you are using the vertical method, starting at the top may be more practical.
The important thing is to plan where the final plug and connector will end up before installing the entire string.
How to Wrap the Bottom of the Tree
The lower part of the tree usually has the widest branches, so it consumes more string length than the top.
Do not rush this section.
Place some lights close to the trunk, then move outward through the branches before continuing around the tree.
How to Light the Middle of the Tree
The middle section is usually where uneven spacing becomes most obvious.
Step back frequently to check for:
- Dark patches
- Overly bright areas
- Visible rings
- Exposed wires
Redistribute the string before adding more lights.
How to Light the Top of the Tree
The top needs fewer lights because the tree narrows.
Avoid bunching too much wire into the final section.
If you plan to use a lit tree topper, leave enough room and electrical access for it.
Don’t Wrap Every Branch Individually
Wrapping every branch can create an extremely dense look, but it also uses a huge amount of string length and takes much longer to install.
For most homes, weaving through groups of branches gives a better balance between effort and appearance.
Use the Tree’s Natural Shape
Follow the direction of the branches rather than forcing the cable into perfectly straight paths.
This helps hide the wire and makes the light placement feel more organic.
How Tight Should the Lights Be?
Keep the wire secure enough that it does not fall away from the branches, but do not pull it extremely tight.
A little slack makes it easier to:
- Adjust sections
- Move branches
- Remove the lights later
Hide the Main Wire
Push the primary cable toward the inside of the tree whenever possible.
Allow the bulbs themselves to remain visible while keeping the wire behind branches.
Green wire is usually easiest to hide on a traditional green tree.
What If the Wire Is White?
White wire works well on:
- White artificial trees
- Flocked trees
- Snow-themed displays
On a dark green tree, white wire can remain noticeable unless it is carefully hidden deeper in the branches.
Warm White or Cool White?
Warm white produces a softer and more traditional look.
Cool white creates a brighter, sharper effect.
If your decorations use red, gold, bronze, or natural materials, warm white usually blends well.
For more detail, read our warm white Christmas lights guide.
How to Wrap Cluster Lights
Cluster lights are much denser than ordinary strings.
Use more spacing between passes because each section already contains many LEDs.
Installing cluster lights exactly like ordinary mini lights can make the tree overly bright.
For a complete guide, see our cluster lights for Christmas trees.
Should Lights Go on Before Garland?
Yes.
The normal order is:
- Lights
- Garland or ribbon
- Large ornaments
- Smaller ornaments
- Tree topper
Installing lights first gives you clear access to the branches and makes it much easier to correct dark areas.
Should Lights Go on Before Ribbon?
Yes.
Ribbon can cover some bulbs, so lighting first lets you see the complete distribution before adding decorative layers.
If wide ribbon hides too much light, pull a few bulbs forward after the ribbon is installed.
Should Lights Go on Before Ornaments?
Definitely.
Trying to weave cables around ornaments increases the chance of knocking decorations off the tree.
Step Back Often
One of the most important techniques is also the simplest.
Step several feet away from the tree regularly.
You will see balance much more clearly from normal viewing distance than while standing directly beside the branches.
Check the Tree With the Room Lights Off
Turn off the main room lighting once most of the Christmas lights are installed.
This makes it easier to spot:
- Dark holes
- Overly bright sections
- Unbalanced sides
- Visible wiring
Rotate the Tree If Possible
If your tree stand allows it, rotate the tree while decorating.
This is easier than repeatedly walking around furniture or squeezing between the tree and a wall.
If the tree cannot rotate, divide it mentally into sections and complete one area at a time.
How to Light a Tree Against a Wall
If the back of the tree cannot be seen, you do not necessarily need the same amount of lighting there.
Concentrate more bulbs on the visible front and side areas.
Still place a small amount of light near the rear edges so the tree does not look dark from an angle.
How to Light a Tree Visible From All Sides
If the tree stands in the middle of a room or near a large window, distribute lights evenly around the entire circumference.
This generally requires more total lighting.
How to Light a Pencil Tree
Pencil trees need less string length because they are narrow.
Vertical lighting works particularly well because the tree already has a tall, narrow shape.
A dense horizontal wrap can quickly look overcrowded.
How to Light a Very Full Tree
Full trees benefit from layered branch lighting.
Place lights deeper inside the foliage to prevent the outer branches from looking like one bright shell.
You may need more lights than a basic height-based estimate suggests.
How to Wrap a Real Christmas Tree
Real trees often have more irregular branches than artificial trees.
Use the natural gaps rather than trying to force perfect symmetry.
Keep wires secure, but avoid pulling so tightly that branches are bent out of shape.
How to Wrap an Artificial Tree
Artificial trees are easier to divide into sections because the branches are more predictable.
Fluff the tree fully before installing lights.
If you light it while the branches are still compressed from storage, the distribution may change once the tree is shaped.
How to Add Extra Lights to a Pre-Lit Tree
Turn on the built-in lights first.
Identify dark sections and add extra lights only where necessary.
Try to match:
- Color temperature
- Brightness
- Bulb size
- Wire color
Horizontal vs Vertical Christmas Tree Lights
| Factor | Horizontal | Vertical |
|---|---|---|
| Traditional appearance | Excellent | Also works well |
| Installation | Simple | Simple once planned |
| Removal | Can take longer | Usually easier |
| Adjusting sections | More difficult | Easier |
| Tall trees | Good | Excellent |
| Layered lighting | Excellent | Excellent |
A Simple Wrapping Method for Beginners
If this is your first time lighting a tree, use this approach:
- Fluff and shape the tree completely.
- Test all light strings.
- Start at the bottom near the power source.
- Wrap loosely around the tree.
- Move some bulbs toward the trunk.
- Keep others near the branch tips.
- Step back after every few feet.
- Adjust dark areas before continuing upward.
- Finish near the top.
- Check the entire tree with the room lights off.
How to Get a Fuller Professional-Looking Result
Use three lighting depths instead of only one.
Place roughly:
- Some lights near the trunk
- Most lights through the middle branches
- Some lights near the branch tips
This layered approach creates more depth than simply adding more bulbs to the outside.
Common Christmas Tree Lighting Mistakes
Wrapping Too Tightly
This makes adjustment difficult and can distort branches.
Keeping Every Light on the Outside
The tree can look flat and overly bright on the surface.
Creating Perfect Horizontal Rings
Visible bands make the lighting look mechanical.
Not Testing Lights First
A dead string becomes much more frustrating after the tree is decorated.
Using Too Few Lights
Large dark sections can make the tree look unfinished.
Adding More Lights Before Repositioning
Sometimes redistribution fixes the problem without requiring another string.
Christmas Tree Lighting Checklist
| Step | What to Check |
|---|---|
| 1 | Tree fully shaped |
| 2 | All strings tested |
| 3 | Enough lights available |
| 4 | Power source planned |
| 5 | Lights distributed at different depths |
| 6 | No large dark areas |
| 7 | Wire mostly hidden |
| 8 | Tree checked from normal viewing distance |
Final Thoughts
There is no single correct way to wrap a Christmas tree with lights.
Horizontal wrapping is easy and traditional. Vertical lighting can make installation and removal simpler. Layering lights through the branches creates the most depth.
Whichever method you use, avoid placing every bulb only on the outer branches.
Work in sections, step back frequently, and adjust the existing lights before automatically adding more.
For planning the amount you need, use our Christmas tree light calculator. If you are working with a standard 7-foot tree, see our 7-foot Christmas tree light guide.