Key Takeaways
Essential Lighting Principles for Every Haunted House:
- Less is More: Darkness is your most powerful tool. Use lighting sparingly to create shadows, hide threats, and build anticipation rather than illuminating everything
- Layer Your Lighting: Combine ambient, accent, and effect lighting at different heights and intensities for professional depth and atmosphere
- Color Matters: Red suggests danger and blood, green implies decay and toxicity, blue creates cold ghostly environments, and purple adds supernatural mystery
- Safety First: Always maintain clear exit paths with subtle emergency lighting, secure all electrical connections properly, and keep fire extinguishers accessible
Quick Room-by-Room Priorities:
- Entrance/Foyer: Establish tone with dim, colored lighting and strategic shadows that hint at horrors ahead
- Hallways: Use directional lighting to guide traffic while creating disorienting effects with strobes or moving shadows
- Living Spaces: Transform familiar rooms with uplighting, blacklights, and hidden light sources that make ordinary objects appear sinister
- Kitchen: Emphasize gore and medical horror with harsh fluorescent lighting, red accents, and strategic spotlights
- Bathrooms: Create claustrophobic tension with flickering lights, mirrors with backlighting, and water-based light effects
- Bedrooms: Build psychological horror through shadows, silhouettes, and lighting that suggests something hiding just out of sight
- Basement: Maximize primal fear with minimal lighting, emergency-style fixtures, and areas of complete darkness
Budget Reality: A professional-looking haunted house lighting setup costs $200-500 for basic effects, $500-1000 for intermediate multi-room installations, and $1000+ for advanced systems with animation, sound synchronization, and custom programming.
Creating an effective haunted house goes far beyond hanging fake cobwebs and positioning plastic skeletons. The difference between a forgettable Halloween display and a truly terrifying experience that visitors remember for years comes down to one critical element: lighting. Professional haunted attractions understand this principle intimately, investing tens of thousands of dollars in sophisticated lighting systems that manipulate fear, control attention, and create immersive environments that feel genuinely dangerous.
The good news is that you don’t need a Hollywood budget or theatrical lighting expertise to transform your home into a convincingly frightening haunted house. Understanding fundamental lighting principles, knowing which techniques work in specific spaces, and applying effects strategically throughout your layout creates professional results with modest investment. This comprehensive room-by-room guide walks you through exactly how to light each space in your haunted house for maximum psychological impact and visitor terror.
Understanding the Psychology of Haunted House Lighting
Before diving into specific rooms and techniques, let’s examine why lighting affects us so powerfully and how to leverage these psychological principles in your haunted house design.
Why Darkness Frightens Us at a Primal Level
Human beings are visual creatures who rely heavily on sight for threat assessment and navigation. When lighting is reduced or eliminated, our brains enter heightened alert states, anticipating danger we cannot see or evaluate. This biological response traces back to our evolutionary history when darkness genuinely posed survival threats from predators and environmental hazards.
Effective haunted house lighting exploits this primal response by creating environments where visitors cannot see clearly. The fear comes not from what they see, but from what they might see. Partial illumination that reveals shapes without defining details triggers imagination, and our minds inevitably conjure threats more frightening than what actually exists. This psychological principle explains why the most terrifying haunted houses use minimal lighting rather than brightly illuminating every scare.
The Power of Contrast and Shadow
Extreme contrast between light and dark creates visual drama that normal environments lack. When a single spotlight illuminates a prop or actor against complete darkness, that element becomes the entire focus of attention. Nothing else exists in the visitor’s perception, creating tunnel vision that heightens impact and prevents distraction.
Shadows add dimensional complexity that flat lighting cannot achieve. A simple mannequin lit from the front appears obviously fake. That same mannequin lit from below or behind casts distorted shadows on walls and ceilings, creating the impression of something larger, more threatening, and less clearly defined. These shadows move and shift as visitors pass through spaces, creating the unsettling sensation that the environment itself is alive and watching.
How Color Temperature Affects Emotional Response
Light color dramatically influences how we perceive and emotionally respond to environments. Warm colors like orange and amber feel comfortable and safe, associated with firelight, sunlight, and home environments. Cool colors like blue and green feel uncomfortable, foreign, and threatening, associated with moonlight, deep water, and toxic substances.
Most effective haunted houses avoid warm lighting entirely, instead using cool and neutral tones that prevent any sense of comfort or safety. When warm colors appear, they’re typically harsh reds suggesting blood and danger rather than cozy oranges. This deliberate color palette keeps visitors perpetually on edge, unable to relax even momentarily.
Creating Spatial Disorientation Through Light
Strategic lighting controls how visitors perceive and navigate space. Bright lighting in one area naturally draws people forward while darkness repels. By manipulating these instincts, you guide traffic flow without obvious barriers or signs. Visitors believe they’re choosing their path when actually lighting design makes certain routes attractive while others appear forbidding.
Lighting also alters spatial perception. Low light makes rooms feel smaller and more claustrophobic. Colored lighting distorts distance perception, making judging how far away objects are difficult. Strobing effects create disorientation where visitors lose spatial reference points entirely. These techniques keep people off-balance psychologically, maintaining tension and uncertainty throughout their experience.
Essential Lighting Equipment for Haunted House Creation
Before addressing specific rooms, let’s review the core lighting tools and equipment that form the foundation of effective haunted house illumination.
LED Par Cans and Wash Lights
LED par cans provide versatile colored lighting suitable for washing large areas or spotlighting specific elements. Modern RGB LED models allow changing colors instantly, creating different moods in the same space throughout the event or between different groups of visitors. These fixtures consume minimal power, generate little heat, and last for thousands of hours, making them ideal for extended Halloween season use.
Choose fixtures with appropriate beam angles for your application. Narrow beams concentrate light on small areas for dramatic spotlighting. Wide beam angles wash entire walls or rooms with color for ambient lighting. Most haunted houses need both types working together, with wide-angle fixtures providing base illumination and narrow beams highlighting specific props or actors.
Blacklights and UV Fixtures
Blacklights reveal fluorescent materials while rendering normal colors nearly invisible, creating surreal environments where only certain elements appear visible. Use blacklights to make teeth, eyes, and white clothing glow eerily while actors’ dark clothing disappears into darkness. Paint invisible messages or patterns on walls using UV-reactive paint that only appears under blacklight, creating hidden elements that surprise visitors.
LED blacklight fixtures offer significant advantages over traditional fluorescent tubes. They provide stronger UV output, cover larger areas, and don’t require warm-up time. For maximum effect, combine blacklights with minimal other lighting. Too much ambient light overwhelms the blacklight effect, making fluorescent materials appear less dramatic.
Strobe Lights and Flash Effects
Strobe lighting creates disorientation by presenting vision as a series of frozen moments rather than continuous motion. This effect makes movement appear jerky and unpredictable, heightening tension and making it difficult to track threats. Actors moving through strobing environments appear to teleport or glitch, seeming suddenly closer without visitors perceiving the actual movement.
Use strobes strategically rather than constantly. Continuous strobing throughout an entire haunted house quickly becomes annoying rather than frightening and may trigger seizures in photosensitive visitors. Deploy strobes in specific high-intensity rooms or for brief moments when actors spring scares. Many modern strobe units offer adjustable flash rates and intensity, allowing you to dial in effects appropriate for each space.
Moving Lights and Gobos
Moving head lights and gobo projectors create dynamic effects that static lighting cannot match. Moving lights automatically pan and tilt, creating the impression of something searching through darkness with a flashlight or spotlight. Gobos are metal or glass templates inserted into lights to project patterns like window shadows, tree branches, prison bars, or abstract textures onto surfaces.
While more expensive than static fixtures, moving lights and gobos deliver significant impact per fixture. A single moving light creates more visual interest than multiple static lights. Similarly, one gobo projector casting moving shadow patterns across an entire room provides atmosphere that would require dozens of conventional fixtures to achieve.
Practical Lighting and Props
Don’t overlook practical lighting that appears as functional objects within your environment. Flickering candles, lanterns, flashlights held by props or actors, and broken fluorescent fixtures that strobe irregularly all create lighting while simultaneously serving as set dressing. These practical sources feel more authentic than theatrical lighting hidden from view.
Battery-operated LED candles with realistic flicker effects provide safe alternatives to open flames while delivering similar atmosphere. Vintage camping lanterns fitted with colored bulbs create portable lighting that actors can carry or that you can position strategically throughout scenes. Broken lamp props with exposed flickering bulbs suggest dangerous electrical situations while providing motivated light sources.
Entrance and Foyer: Setting the Tone
Your haunted house’s entrance establishes expectations and builds anticipation for everything that follows. The transition from normal outdoor lighting to your carefully crafted interior environment should feel dramatic and intentional.
Creating the Threshold of Fear
The physical doorway represents a psychological boundary between safety and danger. Emphasize this threshold with dramatic lighting contrast. The exterior immediately outside your entrance should feel welcoming enough that visitors approach willingly, but hints of what lies beyond should be visible. Colored light spilling through windows, shadows moving behind curtains, or fog backlit from within creates curiosity and anticipation.
Once visitors cross the threshold, lighting should change drastically. Drop ambient light levels significantly, forcing eyes to adjust to darkness. This physiological adaptation period makes visitors vulnerable and disoriented, perfect for establishing your haunted house’s threatening atmosphere. Use colored uplighting on walls or ceiling to immediately signal that normal rules no longer apply in this environment.
Foyer Lighting Techniques
If your haunted house includes an entry foyer or receiving area, this space sets the tone for the entire experience. Avoid bright lighting that would break immersion or allow visitors to see too much of what lies ahead. Instead, use dim, colored ambient lighting that provides just enough illumination for safe navigation while maintaining mystery.
Position lights low near the floor rather than overhead. This unnatural lighting angle immediately feels wrong and unsettling. Paint walls in dark colors that absorb rather than reflect light, requiring minimal fixtures to maintain low light levels. A single overhead fixture with a low-wattage red or blue bulb, perhaps with a flickering effect, creates focal point illumination while preserving shadows in corners and along walls.
Using Fog and Haze for Atmospheric Enhancement
Fog machines transform ordinary lighting into volumetric beams that slice through darkness dramatically. The fog particles scatter and reflect light, making beams visible as three-dimensional objects in space rather than just illuminating surfaces. This effect adds tremendous production value with minimal additional cost, as basic fog machines cost under $50.
For entrance areas, use fog generously to create atmosphere and obscure clear sightlines into subsequent rooms. Position the fog machine so output drifts through doorways into the entrance, suggesting the supernatural mist originates from deeper within your haunted house. Light fog from behind or below using colored LEDs to create glowing clouds that feel otherworldly and threatening.
Sound and Light Synchronization
Coordinate entrance lighting with audio elements for enhanced impact. Thunder sound effects synchronized with bright white flashes simulate lightning, suggesting visitors are entering during a terrible storm. Dramatic musical crescendos accompanied by lighting intensity increases or color changes create theatrical moments that feel cinematic and intentional.
Even simple synchronization creates big impact. A doorbell or knock sound effect followed by a lighting change suggests responsive, intelligent environments rather than static displays. This implied intelligence makes your haunted house feel more threatening, as if the building itself is aware of visitors and reacting to their presence.
Hallways and Corridors: Building Tension
Hallways serve as connective tissue between major scenes and rooms, but they’re far more than simple pathways. These transitional spaces build tension, control pacing, and set up scares that pay off in adjacent rooms.
Directional Lighting for Traffic Flow
Guide visitors through hallways using strategic lighting placement. Illuminate the far end of corridors while keeping the entrance end relatively dark, naturally drawing people forward into spaces rather than encouraging them to linger or turn back. This technique controls pacing, ensuring groups move through at appropriate speeds without obvious pushing or verbal direction.
Avoid overlighting hallway floors, as clear visibility reduces fear. Instead, use wall-mounted fixtures or uplights positioned every 8-10 feet, creating pools of illumination separated by shadows. Visitors naturally move from light pool to light pool, giving you control over their exact path and timing. Position scares in the shadow zones between lights where threats remain hidden until visitors are close.
Creating Claustrophobic Atmosphere
Make hallways feel narrower and more oppressive through lighting choices. Side lighting from fixtures positioned at knee or waist height emphasizes walls while keeping the ceiling in darkness. This makes ceilings feel lower and spaces feel more confining. Dark paint colors on walls and ceiling enhance this effect, as dark surfaces absorb light rather than reflecting it.
Avoid center ceiling fixtures that would illuminate hallways evenly. Instead, use asymmetrical lighting that leaves one side darker than the other. This imbalance creates unease, as visitors instinctively watch the darker side expecting threats to emerge from shadows while worrying about what might approach from behind in the illuminated zone.
Strobing Effects in Confined Spaces
Strobe lighting works exceptionally well in hallways, creating disorientation in spaces where visitors have limited movement options. The confined environment prevents escape from the effect, forcing sustained exposure that maximizes psychological impact. Actors moving through strobing hallways appear to teleport closer with each flash, creating genuine fear responses.
Combine strobes with fog for intensified effects. Fog reflects and scatters strobing light, creating more complete disorientation where the environment itself seems to pulse and shift. Position strobes at the far end of hallways so visitors must walk toward the source to progress, building dread as the effect intensifies with approach.
Shadow Play and Silhouettes
Project moving shadows onto hallway walls using hidden actors or mechanical props positioned behind screens or scrims. Visitors see enormous threatening shadows approaching but cannot clearly identify the source, creating mystery and anticipation. The shadows telegraph scares before they happen, building tension as visitors know something is coming but don’t know exactly when or from where.
Use gobo projectors to cast shadows of window frames, tree branches, or prison bars moving across walls and floors. These abstract patterns suggest the hallway exists within a larger threatening structure, like a prison, asylum, or haunted mansion. The moving shadows imply wind or other environmental forces, making static spaces feel dynamic and alive.
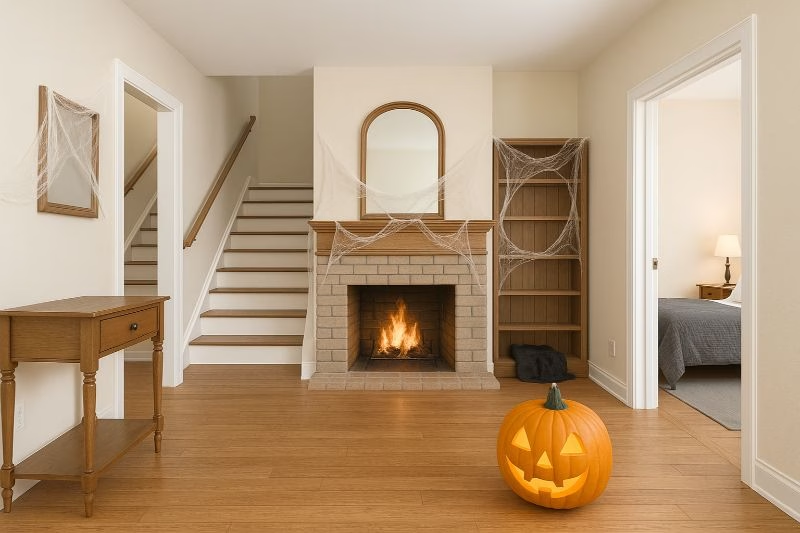
Living Room and Common Areas: Subverting the Familiar
Living rooms and similar common spaces work well in haunted houses because they’re inherently familiar. Everyone has spent time in living rooms, making these spaces feel initially safe and recognizable. Effective lighting subverts these expectations, transforming comfortable spaces into threatening environments.
Uplighting for Unsettling Effects
Standard living room lighting comes from overhead fixtures and lamps positioned at comfortable heights. Eliminate all normal lighting and replace it with uplighting from floor level. Position LED pars behind furniture, in corners, or along baseboards, angling them upward to wash walls and ceiling with colored light while leaving the main room space relatively dark.
This inverted lighting scheme makes familiar objects appear sinister. Furniture casts long shadows upward across walls. Faces lit from below display the classic “campfire story” effect where features appear distorted and threatening. The absence of expected overhead lighting signals that something is fundamentally wrong with this space, even if visitors can’t immediately identify what.
Blacklight Living Room Transformation
Transform living rooms into surreal environments using blacklight as the primary illumination. Paint or decorate with UV-reactive materials that only appear under blacklight, creating hidden artwork, messages, or patterns invisible under normal lighting. White or light-colored furniture and decorations glow brilliantly while wood, metal, and dark fabrics disappear into blackness.
Use UV-reactive paint to add gore effects invisible in normal light. A couch that appears normal under white light reveals bloodstains under blacklight. Walls display handprints, writing, or artistic elements that only manifest in UV. This creates the impression of hidden realities underlying normal appearances, tapping into fears about what might lurk beneath familiar surfaces.
Creating Focal Points with Spotlighting
Draw attention to specific props, actors, or set pieces using tight spotlights that isolate elements against darkness. A single spotlight on a rocking chair moving by itself, a creepy doll positioned prominently, or an actor frozen in place creates a tableau that visitors must confront before progressing. The surrounding darkness ensures nothing distracts from these focal points.
Use colored spotlights to enhance storytelling. A green spotlight on a sickly-looking figure suggests disease or supernatural corruption. Red spotlights on bloody scenes emphasize gore and danger. Blue spotlights create cold, ghostly atmospheres perfect for spectral apparitions. The color choice should reinforce whatever emotion or reaction you want that specific element to generate.
Practical Light Sources as Set Dressing
Include lamps, candles, or other practical light sources visible within living room scenes, but ensure they provide incorrect or inadequate illumination. A floor lamp with a flickering red bulb instead of appropriate white light signals malfunction and danger. Candelabras with LED candles provide period-appropriate lighting for gothic themes while maintaining safety.
These practical sources should supplement rather than replace theatrical lighting. Their relatively weak output maintains low overall light levels while adding authenticity and visual interest. Visitors see lighting sources but remain in predominantly dark environments, creating the psychological disconnect between seeing light and actually being able to see clearly.
Kitchen and Dining Room: Medical Horror and Gore
Kitchens and dining rooms naturally suit certain horror themes, particularly medical horror, cannibalism, or torture scenes. The presence of knives, cutting boards, and food preparation surfaces provides built-in props that lighting can emphasize for maximum disturbing impact.
Harsh Fluorescent Lighting Effects
Medical and industrial horror benefits from harsh overhead fluorescent lighting that creates unflattering, cold environments. Use fluorescent tubes or LED tubes in cool white (5000K or higher color temperature) to recreate this aesthetic. The high color temperature renders skin tones sickly and emphasizes blood and gore with clinical clarity rather than romantic shadow.
Implement flickering effects with fluorescent lighting to suggest electrical problems or neglect. Fluorescent tubes that intermittently strobe on and off create disorienting environments while maintaining the institutional feeling. Some LED tube fixtures include built-in flicker effects specifically designed for haunted attractions, providing this effect without actual electrical problems.
Surgical Spotlight Techniques
Position bright white spotlights directly over preparation areas, operating tables, or similar focal points, mimicking surgical lighting. These intense pools of light in otherwise dim spaces draw attention to whatever horror you’ve staged below. The bright illumination prevents visitors from looking away or mentally softening details, forcing confrontation with gore or disturbing scenes.
Surround these bright spots with minimal ambient lighting, creating extreme contrast. The darkness surrounding surgical lights makes brightly lit scenes feel isolated and inescapable, like being trapped under examination. This technique works particularly well for scenes involving actors, as the harsh lighting adds authenticity while the surrounding darkness hides actor preparation areas and movement paths.
Red Accent Lighting for Gore Enhancement
Supplement primary lighting with red accents positioned to emphasize bloody elements. Small LED spotlights or strips placed near countertops, sinks, or props make blood effects appear more vivid and realistic. Red uplighting on walls behind gore scenes creates ominous backdrops that enhance rather than distract from foreground horror.
Avoid using red as your only light source in kitchen spaces, as monochromatic red lighting becomes visually monotonous and reduces rather than enhances detail visibility. Instead, use red as strategic accent lighting with cool white or blue primary illumination providing overall visibility. This combination maintains clarity while emotionally emphasizing dangerous or bloody elements.
Under-Cabinet and Toe-Kick Lighting
Create eerie ambient glow using LED strips installed under cabinets or along toe-kicks at floor level. This low-level illumination provides just enough light for safe navigation while maintaining threatening atmosphere. Use colored LED strips in green, purple, or red rather than standard white to prevent any sense of normalcy or comfort.
This technique also illuminates lower areas where you might position crawling props or actors, making these low-profile scares visible without requiring overhead lighting that would illuminate too much of the room. The unnatural lighting angle makes everything appear distorted and wrong, even ordinary kitchen elements.
Bathroom: Claustrophobia and Psychological Horror
Bathrooms work brilliantly in haunted houses because they’re inherently private, vulnerable spaces. We’re culturally conditioned to expect privacy in bathrooms, making their inclusion in public haunted house contexts inherently uncomfortable. Lighting amplifies this unease significantly.
Mirror Lighting and Reflection Techniques
Mirrors offer unique opportunities for lighting-based scares and effects. Backlight mirrors from behind using LED strips positioned around the perimeter, creating glowing frames that draw attention while making reflected images appear highlighted and slightly unreal. This effect suggests that reflections might not perfectly match reality, tapping into mirror-based horror tropes.
Create disappearing or appearing effects in mirrors using carefully controlled lighting angles. Position props or actors at angles where they’re visible in mirrors but not in direct sightlines, creating the impression that mirrors reveal truths invisible to direct observation. Alternatively, light spaces so actors or props are visible directly but their mirror reflections are mysteriously absent, suggesting vampires or other supernatural entities.
Flickering Fluorescent Fixtures
Fluorescent lighting dominates bathroom environments, making flickering fluorescents instantly recognizable and unsettling. Use LED fixtures with built-in flicker effects or control fluorescent ballasts to create irregular pulsing, strobing, or complete failure patterns. The irregular rhythm prevents adaptation; visitors never settle into comfortable expectations about whether lights will stay on or plunge them into darkness.
Combine flickering lights with sound effects of electrical buzzing, crackling, or failing ballasts. This audio-visual synchronization creates believable technical failure atmospheres suggesting neglect, abandonment, or supernatural interference with electrical systems. The implied danger of failing electrical systems in wet bathroom environments adds realistic threat layers beyond just visual scares.
Bloody Bath and Shower Lighting
Tubs and showers backlit with red lighting create instantly readable horror imagery. Position red LED strips or fixtures behind translucent shower curtains, creating ominous glows suggesting blood or danger behind the barrier. Silhouettes of props or actors behind illuminated curtains create shadows that telegraph potential threats without revealing exact details.
For filled bathtubs, use submersible LED lights positioned in water tinted red with food coloring or dye. The internal illumination makes bloody water glow eerily while casting red reflections on surrounding tile or walls. This technique is dramatically effective and surprisingly safe with proper submersible LED lights rated for water contact.
Vanity and Medicine Cabinet Spotlights
Light vanity areas and medicine cabinets as if they’re shrines or altars to disturbing rituals. Small LED spotlights directed at opened medicine cabinets revealing disturbing contents, or vanities displaying surgical tools, teeth, or other horror elements create focal points that visitors must examine as they navigate tight bathroom spaces.
Use cool blue or green lighting for these accent spots to create clinical, unnatural feels. The colored lighting makes ordinary bathroom items appear strange and threatening while emphasizing any gore, medical, or supernatural props you’ve positioned as featured elements.
Bedroom: Intimate Terror and Psychological Scares
Bedrooms represent private, vulnerable spaces associated with sleep, dreams, and darkness. This intimate context makes bedroom scenes particularly unsettling when transformed into haunted house environments. Lighting in bedroom spaces should emphasize shadows, silhouettes, and partial visibility over clear illumination.
Silhouette Creation Behind Curtains or Screens
Position props or actors behind backlit curtains, screens, or translucent materials, creating threatening silhouettes visible from the visitor side. This technique suggests something present but not fully revealed, building tension through mystery. The silhouettes should move subtly or remain ominously still, both approaches creating unease through implied presence.
Use warm amber or red backlighting to create sunset or fire-glow effects that make silhouettes appear as shadow puppets. Alternatively, cool blue lighting suggests nighttime or supernatural presences. The color choice should support whatever narrative theme your bedroom scene conveys, whether it’s a murder scene, haunting, possession, or other horror concept.
Under-Bed Illumination
Light the space beneath beds with dim, colored LEDs to create the impression that something hides in this classic childhood fear location. Use motion sensors to trigger under-bed lights when visitors approach, suggesting whatever lurks below is awakening or becoming aware of their presence. This reactive lighting makes the environment feel responsive and intelligent rather than static.
Alternatively, use under-bed lighting to cast ominous glows across the floor, creating focal points that draw attention to the bed area. Visitors naturally investigate lit areas, so this technique guides them to examine beds more closely than they might otherwise, setting up either scare opportunities or disturbing discoveries of props or scenes you’ve staged.
Closet and Doorway Backlighting
Create threatening doorway silhouettes by backlighting open closet doors or room doorways. Position lights behind partially open doors so they spill around edges, creating bright frames around dark openings. This draws attention to these transition spaces while simultaneously making it impossible to see clearly what might wait just beyond the threshold.
Combine this with fog that spills from backlit doorways, creating volumetric light beams and suggesting that whatever space lies beyond is so corrupt or supernatural that even its atmosphere leaks into the current room. The fog adds movement and dimension to static doorway lighting, making the effect more dynamic and alive.
Nightstand and Lamp Practical Lighting
Use table lamps and nightstand lights as both set dressing and actual light sources, but ensure they provide inadequate or incorrect illumination. A bedside lamp with a bare red bulb provides motivation for light while maintaining dark, threatening atmosphere. Lampshades removed, damaged, or covered with filters transform familiar bedroom lighting into something wrong and disturbing.
Position these practical lights to create pools of illumination that reveal specific details while keeping surrounding areas dark. A lamp illuminating a disturbing book, photographs, or objects on a nightstand creates a focal point that tells story while the dark room beyond suggests larger threats lurking out of sight.
Basement and Cellar: Primal Underground Fear
Basements tap into primal fears of underground spaces, confined areas, and places where dangerous things might hide. If your haunted house includes basement spaces, these areas should feel like descents into genuine danger with lighting that emphasizes rather than alleviates this instinctive dread.
Minimal Lighting for Maximum Fear
Resist the temptation to illuminate basements adequately. These spaces should push darkness to its limits, using absolute minimum lighting necessary for safe navigation. The genuine fear of basements comes from reduced visibility and the inability to clearly assess surroundings. Lighting that eliminates these factors reduces rather than enhances the inherent scariness of underground spaces.
Use individual low-wattage bulbs spaced far apart rather than continuous lighting. Create long stretches of genuine darkness between light sources, forcing visitors to traverse truly dark spaces where they cannot see clearly. This darkness makes every shadow a potential threat and every sound more frightening since visitors cannot visually verify safety.
Bare Bulb and Industrial Fixture Aesthetics
Expose all lighting fixtures as bare bulbs, industrial cages, or utilitarian fixtures that suggest function over comfort. Basements should never feel finished or comfortable. Visible conduit, junction boxes, and crude wiring enhance the aesthetic of neglected, dangerous spaces where safety standards are ignored or have failed over time.
Use low-wattage bulbs in these fixtures, perhaps 15-25 watts equivalent, just enough to create pools of dim light without eliminating shadows or dark corners. Vintage Edison-style LED bulbs provide authentic industrial aesthetics while consuming minimal power and generating no heat. Dirty or artificially aged fixtures enhance the abandoned atmosphere lighting creates.
Emergency Lighting and Exit Sign Effects
Recreate emergency lighting scenarios using battery-powered LED lights designed to look like emergency fixtures. These provide just enough illumination to navigate while creating atmosphere suggesting power failures, evacuations, or disasters. The green glow of exit signs combined with dim emergency lighting creates instantly recognizable danger aesthetics.
Use flickering effects with emergency lighting to suggest failing batteries or damaged systems. The irregular, unreliable lighting creates uncertainty where visitors cannot depend on consistent visibility. Combine this with sound effects of alarms, failing generators, or dripping water to create multisensory atmosphere suggesting systemic failure and danger.
Directional Flashlight and Lantern Effects
Create moving light sources using actors carrying flashlights or lanterns, or mechanical systems that move lights along predetermined paths. These roving lights break the static nature of fixed lighting, creating the impression of searching guards, investigating authorities, or other entities moving through the basement with you.
The moving lights alternatively illuminate and conceal different basement areas, forcing visitors to glimpse threats briefly before darkness reclaims them. This partial, interrupted visibility is more frightening than either consistent darkness or consistent light, as visitors must piece together understanding from fragmentary glimpses while worrying about what they’ve missed in darkness.
Crawlspace and Pipe Underlighting
If your basement includes exposed pipes, ducts, or crawlspace access, use these architectural elements with strategic lighting. LED strips along pipes or under ductwork create linear light elements that guide eyes through space while leaving vertical areas dark. This horizontal focus makes ceilings disappear into darkness, altering spatial perception.
Light crawlspace openings from within using dim colored lights that suggest something inhabits these tight, inaccessible spaces. The glow implies depth and presence beyond the opening without revealing details, letting imagination create threats more frightening than explicit revelation.
Attic and Upper Floor Spaces: Forgotten Horror
If your haunted house includes attic or upper floor spaces, these areas benefit from lighting approaches that emphasize age, neglect, and the eerie quality of spaces where forgotten things accumulate and decay.
Dusty Beam Lighting Through Fog
Create visible light beams streaming through attic windows or floor cracks using fog machines combined with tightly focused spotlights. The beams reveal floating dust particles, suggesting age and abandonment. These volumetric light shafts create gothic atmosphere reminiscent of old mansions, churches, or mausoleums where light filters through neglected spaces.
Position lights to create crosshatch patterns of beams at different angles, suggesting multiple light sources filtering through gaps in deteriorating structures. The irregular patterns prevent the space from feeling deliberately lit for display, instead suggesting incidental illumination through structural failures that allows outside light to penetrate.
Antique and Period Fixture Aesthetics
Use vintage-style lighting fixtures appropriate to whatever historical period your haunted house theme suggests. Victorian gas lamps, old lanterns, or early electric fixtures with visible filaments create authentic period atmosphere while providing motivated lighting sources. Modern LED bulbs in vintage housings deliver safe, cool, controllable light while maintaining visual authenticity.
Keep these period fixtures dim, using low-output bulbs that create atmosphere without adequate illumination. Historical spaces wouldn’t have been brightly lit, so accurate period lighting naturally creates the dark, shadowy environments effective for haunted attractions. This historical accuracy serves functional lighting goals while enhancing believability.
Highlighting Cobwebs and Texture
Use raking light positioned at extreme angles to emphasize cobwebs, texture, and surface irregularities throughout attic spaces. Light positioned near floor or ceiling level and angled across surfaces rather than perpendicular creates dramatic shadows that make every surface irregularity visible, enhancing the feeling of age, neglect, and decay.
This lighting technique makes artificial cobwebs appear more dimensional and realistic by casting fine shadows. It also emphasizes any distressed painting, weathering, or texturing you’ve applied to surfaces, making set dressing more convincing by revealing its three-dimensional nature rather than lighting it flatly.
Toy and Object Spotlighting
Attics typically contain stored objects, toys, and memorabilia, which in haunted contexts become sinister. Use small spotlights to illuminate specific creepy dolls, old toys, or mysterious objects, creating focal points throughout the space. The contrast between spotlit objects and surrounding darkness makes these elements impossible to ignore as visitors pass.
Create slight movement in spotlit objects using hidden motors, fans creating air movement, or mechanical systems. When visitors perceive movement in objects they expect to be static, especially toys or dolls with faces, the effect is deeply unsettling. The spot lighting ensures visitors see these movements clearly rather than missing them in darkness.
Outdoor Areas and Transitions: Extending the Experience
If your haunted house includes outdoor areas, pathways, or queuing zones, proper lighting in these spaces maintains atmosphere and controls pacing from the moment visitors arrive until they exit.
Pathway Lighting for Safe Navigation
Safety lighting in outdoor haunted house areas requires balance between adequate visibility for secure footing and minimal light pollution that would break immersion. Use low-level pathway lights positioned every 6-8 feet along walkways, providing just enough illumination to prevent trips and falls without brightly lighting the entire area.
Choose colored pathway lights rather than white to maintain Halloween atmosphere. Orange provides traditional seasonal feel while offering decent visibility. Purple creates more mysterious mood. Red suggests danger and blood. Avoid colors that significantly distort spatial perception like green or blue for pathway lighting where fall risks exist.
Perimeter and Facade Lighting
Light your building’s exterior with colored floods or uplights that establish atmosphere before visitors enter. This external lighting serves multiple purposes: creating curb appeal that attracts visitors, establishing your haunted house’s theme and tone, and providing necessary visibility for queue management and crowd control.
Use different colors for different facade areas to suggest distinct zones or rooms visible from outside. This color-coding helps build anticipation by suggesting variety and complexity within. Ensure some windows or openings show movement, shadows, or light changes visible from outside, hinting at activity within that builds curiosity and dread.
Queue Line Entertainment Lighting
If lines form outside your haunted house, provide lighting that maintains atmosphere and entertains waiting visitors. Project moving effects on nearby walls, use spotlights to illuminate outdoor props or actors, or create light shows synchronized with music. This keeps crowds engaged while waiting and builds excitement for the main attraction.
Vary lighting intensity and effects as visitors move through the queue toward the entrance. Areas furthest from the entrance can use brighter, more active lighting. As visitors near entry, reduce lighting gradually, allowing eyes to begin adapting to darkness before entering. This gradual transition prevents the jarring adjustment that bright queue lighting directly adjacent to dark interior entrances would create.
Exit Area Transition Lighting
Plan lighting for exit areas where visitors emerge from your haunted house. This transition from darkness back to normal illumination should be gradual rather than jarring. A sudden brightness after prolonged darkness is physically uncomfortable and can break the lingering atmosphere you’ve created.
Use dimmed transitional lighting in immediate exit areas, gradually increasing to normal levels over 10-15 feet of travel. This allows eyes to adjust comfortably while visitors decompress from the intense experience. The gradual brightening also provides opportunity for one final scare, as visitors begin to relax prematurely before fully exiting the experience.
Technical Considerations and Safety Requirements
Effective haunted house lighting requires attention to technical details and safety requirements that ensure your attraction operates reliably throughout the season without creating hazards.
Electrical Load Management and Power Distribution
Calculate total electrical draw for all lighting fixtures and ensure you’re not overloading circuits. Most residential circuits handle 15-20 amps maximum. LED lighting makes this easier than older technologies since LEDs draw minimal power, but extensive installations still require careful planning. Distribute lights across multiple circuits rather than powering everything from single outlets.
Use heavy-duty extension cords rated for the amperage you’re drawing, an d avoid daisy-chaining multiple extension cords which creates resistance, heat buildup, and fire hazards. Professional power distribution boxes with multiple outlets and built-in circuit protection offer safer alternatives for large installations. Label all power connections clearly so you can troubleshoot issues quickly during operation without tracing cables through dark spaces.
DMX Control Systems for Synchronized Effects
DMX (Digital Multiplex) control systems allow centralized management of multiple lighting fixtures from a single controller. This professional protocol lets you program complex lighting sequences, synchronize fixtures with audio, and create dynamic effects impossible with individual fixture controls. Entry-level DMX controllers cost $100-200 and dramatically expand creative possibilities.
DMX also simplifies operation during events. Rather than manually adjusting dozens of individual lights, program complete scenes activated with single button presses. Create different lighting states for different visitor groups, special effects triggered by actors or motion sensors, and emergency modes that illuminate exits instantly if needed. The investment in DMX control pays dividends in operational flexibility and effect sophistication.
Fog Machine Placement and Ventilation
Fog machines enhance lighting dramatically but require thoughtful placement and ventilation planning. Position fog machines where output can disperse throughout spaces naturally without creating excessively dense fog that reduces visibility below safe levels. Fog sinks toward the floor naturally, creating low-lying ground fog perfect for graveyard or swamp scenes.
Ensure adequate ventilation prevents fog accumulation that triggers smoke alarms or creates respiratory discomfort. Open windows slightly in areas with heavy fog use, or use fans positioned strategically to move air without creating visible wind effects that would disturb decorations. Water-based theatrical fog is safe for short-term exposure but sustained high concentrations can cause throat irritation or coughing in some individuals.
Emergency Lighting and Exit Requirements
Regardless of theatrical lighting design, maintain clearly marked, illuminated exits that visitors can locate even if all effect lighting fails. Battery-powered emergency lights or exit signs connected to backup power ensure safety even during power failures. Local fire codes often mandate specific exit lighting requirements for public attractions, even temporary residential haunted houses open to multiple groups.
Create lighting zones that can be instantly illuminated to full brightness in emergencies. Motion sensors or panic buttons positioned throughout the attraction should trigger emergency lighting modes that override all theatrical effects. Practice emergency procedures with all staff members so everyone knows how to activate emergency lighting and safely evacuate visitors if needed.
Heat Management and Fire Safety
LED lighting produces minimal heat compared to incandescent or halogen fixtures, making it much safer for haunted attractions with fabric decorations, foam props, and crowds. However, any electrical equipment generates some heat and requires proper clearance from combustible materials. Never place lights directly against fabric, paper, or foam, and ensure adequate air circulation around fixtures.
Keep fire extinguishers accessible throughout your haunted house, with staff trained on their location and use. Avoid open flames entirely, using LED candles and flame-effect bulbs instead of actual fire. If using fog machines, understand that fog fluid residue can accumulate on surfaces over time and is flammable if allowed to build up excessively. Clean surfaces regularly during extended run periods.
Weather Protection for Outdoor Lighting
Outdoor lighting requires appropriate weather resistance for October conditions. Look for fixtures rated IP65 or higher, indicating protection against dust and water jets. Seal all electrical connections with weatherproof covers or electrical tape, and elevate connections above ground level where water accumulates.
Check all outdoor lighting before each operating night, as temperature fluctuations and moisture can cause connections to loosen or corrode. Store outdoor fixtures indoors when not in use if possible, or cover them with weatherproof tarps. Quality outdoor lighting survives multiple seasons when properly protected, while inadequately protected equipment fails quickly.
Advanced Lighting Techniques for Experienced Haunters
Once you’ve mastered basic haunted house lighting, these advanced techniques take your attraction to professional levels that rival commercial haunts.
Projection Mapping for Architectural Effects
Projection mapping uses specialized software to align video projections precisely with three-dimensional surfaces, making walls appear to crumble, faces emerge from flat surfaces, or entire rooms transform into different environments. While sophisticated projection mapping requires significant investment in projectors and software, basic effects are achievable with consumer equipment and free mapping tools.
Use projection mapping to create talking portraits, windows that show scenes from different times or dimensions, or environmental effects like spreading mold, crawling insects, or flowing blood that appear to move across actual surfaces. The alignment between projection and physical architecture creates convincing illusions that flat projections cannot achieve.
Pepper’s Ghost Effect Implementation
The Pepper’s Ghost illusion uses angled glass or transparent film to reflect images of hidden objects, creating the appearance of transparent ghosts or apparitions floating in space. This theatrical technique requires careful lighting balance where the hidden object is brightly lit while the visible area remains dark, causing the reflection to appear as a transparent overlay.
Construct simple Pepper’s Ghost effects using sheet glass or clear plastic film positioned at 45-degree angles to reflect images from below or to the side. Visitors see ghostly figures appear to materialize in empty spaces, then vanish when lighting changes eliminate the reflection. This classic illusion remains effective because most modern audiences have never seen it before.
Infinity Mirror and LED Installations
Infinity mirrors create illusions of endless depth using two mirrors facing each other with LED lights between them. One mirror is fully reflective while the other is semi-transparent, allowing viewers to see reflections extending into apparent infinity. These installations create mesmerizing, supernatural effects perfect for portals, dimensional rifts, or windows into impossible spaces.
Build infinity mirror installations into doorways, picture frames, or standalone props. The effect is particularly powerful when combined with colored LEDs that slowly change, creating the impression of depth or movement within the infinite reflections. The construction is relatively simple but delivers highly impressive results that visitors remember long after leaving.
Reactive Lighting with Motion and Sound Sensors
Install motion sensors throughout your haunted house to trigger lighting changes when visitors enter specific zones. Lights that respond to presence create impressions of intelligent, aware environments rather than static displays. Combine motion sensors with timed sequences that escalate after triggering, making lights progressively more threatening as visitors linger in areas.
Sound sensors trigger lights in response to screams, talking, or other audio cues. A lighting flash synchronized with a visitor’s scream creates the impression their fear has physical effects on the environment. This reactive programming requires more sophisticated control systems but creates memorable moments where visitors feel they’re affecting rather than just observing the haunted house.
UV Reactive Painting and Set Design
Expand beyond simple blacklight effects by creating entire scenes with layers of normal and UV-reactive paint. Scenes look one way under normal lighting but transform completely under blacklight, revealing hidden messages, changing artwork, or exposing gore effects invisible in standard light. This transformation creates powerful surprise moments and rewards repeat visitors who see different versions of the same space.
Use UV paint strategically to guide traffic flow or highlight clues. Paint arrows, footprints, or pathways visible only under blacklight, creating invisible guidance systems. Write messages or warnings that appear only to visitors with blacklight flashlights, creating interactive puzzle elements within your haunted house experience.
Budgeting and Cost Management Strategies
Creating effective haunted house lighting doesn’t require unlimited budgets. Strategic planning and smart purchasing decisions deliver professional results within reasonable financial constraints.
Prioritizing Spending for Maximum Impact
Allocate your lighting budget strategically rather than spreading it evenly across all rooms. Invest more heavily in entrance areas and climactic scenes that create first and last impressions. These high-impact moments justify premium lighting while less critical transitional spaces function adequately with basic lighting.
Focus on versatile equipment that serves multiple purposes across different areas. RGB LED pars that change colors work in any room with different programming, delivering better value than single-color fixtures limited to specific uses. Quality DMX-controllable fixtures cost more initially but offer flexibility that reduces total fixture counts needed.
DIY Lighting Modifications and Builds
Build custom lighting fixtures from commodity components for significant savings. Purchase individual RGB LED strips, drivers, and controllers separately rather than complete fixtures, assembling custom installations at fraction of retail costs. Hardware stores carry aluminum channel designed for LED strips that creates professional-looking fixtures for dollars per foot.
Modify thrift store lamps, lanterns, and fixtures with colored LED bulbs, filters, or custom shades to create unique practical lighting for themed rooms. Vintage fixtures bring authenticity and character while costing pennies compared to theatrical equipment. With basic electrical knowledge, you can create custom effects impossible to purchase as standard products.
Renting vs Buying Specialized Equipment
Consider renting expensive specialized equipment like projection mapping systems, moving lights, or sophisticated DMX controllers if your haunted house operates for just a few nights annually. Rental costs of $100-300 for a weekend are justified versus $1000+ purchases for equipment used briefly. Local theatrical suppliers, party rental companies, or audio-visual businesses often rent lighting equipment.
However, purchase rather than rent basic workhorses like LED pars, fog machines, and standard dimmers used annually. These items pay for themselves after 2-3 seasons and remain useful for other applications like holiday decorating or parties. Analyze each equipment category individually to determine whether renting or buying makes better financial sense.
Building Your Collection Over Multiple Seasons
Avoid the pressure to create your ultimate haunted house vision in a single year. Purchase core lighting equipment in year one, add advanced fixtures in year two, and expand control systems and effects in subsequent seasons. This gradual approach spreads costs across multiple years while allowing you to learn and refine your approach before major investments.
Start with lighting one or two rooms exceptionally well rather than illuminating an entire house inadequately. A smaller, intensely effective haunted house creates better visitor experiences than extensive but poorly lit attractions. Expand room by room as budget allows, maintaining quality over quantity throughout the growth process.
Maintenance and Storage Considerations
Proper equipment care extends the life of your lighting investment and ensures reliable performance season after year.
End-of-Season Equipment Care
Clean all lighting fixtures before storage, removing dust, fog residue, and grime accumulated during operation. Fog machine residue particularly accumulates on lenses and internal components, reducing output and potentially causing overheating. Use appropriate optical cleaners for lenses and mild detergent solutions for fixture housings.
Test all equipment before packing away, identifying and addressing failures immediately rather than discovering problems during next season’s setup. Replace failed LEDs, repair loose connections, and document any issues requiring attention. This post-season maintenance prevents frustrations when beginning setup next year.
Proper Storage Techniques
Store lighting equipment in climate-controlled environments when possible. Extreme temperature fluctuations damage electronic components and degrade plastics. If climate-controlled storage isn’t available, choose locations with moderate temperatures and low humidity rather than hot attics or damp basements.
Organize storage by room or fixture type, labeling containers clearly so you can locate specific equipment quickly during setup. Include photographs of fixture placements from successful years so you can recreate effective lighting schemes rather than starting from scratch. Document DMX addresses, color settings, and any custom programming that would be difficult to recreate from memory.
Cable Management and Organization
Coil cables properly using over-under technique that prevents kinks and extends cable life. Label both ends of power and DMX cables with matching identifiers so you know which cables connect where. Store cables separately from fixtures in dedicated containers, preventing tangling and making setup more efficient.
Consider color-coding cables by circuit or room, using colored tape or labels to identify which cables belong to which systems at a glance. This organization saves hours during setup and troubleshooting, particularly in dark haunted house environments where reading small labels is difficult.
Testing, Rehearsal, and Fine-Tuning
Even perfectly planned lighting requires testing and adjustment to deliver optimal results with actual visitors moving through your haunted house.
Walking Through Visitor Perspectives
Before opening, walk through your haunted house multiple times from visitor perspectives at different speeds. Fast walkers see different things than those who move slowly. Identify areas where lighting reveals too much or too little, where shadows create confusion about pathways, or where effects aren’t visible from expected viewing angles.
Bring friends or family for fresh perspective testing. Creators become blind to issues after seeing spaces repeatedly during setup. First-time observers identify problems immediately obvious to new eyes but invisible to those too familiar with the environment.
Adjusting for Different Group Sizes
Lighting that works perfectly for individual visitors or couples may fail for larger groups. Multiple people create more shadows and light reflection from phones or cameras. Test with groups of various sizes, adjusting fixture positions or adding supplemental lighting to maintain effects regardless of visitor count.
Consider creating different lighting states for different group sizes if your control system allows. Larger groups may require slightly brighter navigation lighting for safety while maintaining effective atmosphere. Smaller groups can handle more extreme darkness and contrast.
Actor Integration and Coordination
If your haunted house includes live actors, rehearse extensively with final lighting. Actors need to know where shadows hide them, where they’ll be visible, and where to position themselves for maximum impact. Lighting that works beautifully with props may need adjustment when actors perform in the same spaces.
Mark actor positions with glow tape invisible to visitors but clear to performers in darkness. Practice scare timing with reactive lighting systems so actors and lights coordinate perfectly. The difference between a moderately effective scare and one that genuinely terrifies visitors often comes down to precise timing between actor performance and lighting effects.
Addressing Last-Minute Problems
Keep backup bulbs, batteries, extension cords, and basic tools accessible during operating hours. Lighting failures happen, and quick repairs keep your haunted house running smoothly. Designate someone specifically responsible for technical troubleshooting so actors can focus on performance while technical issues receive immediate attention.
Create simplified backup lighting plans that can be implemented quickly if major systems fail. Even basic flashlights or battery lanterns strategically placed maintain some atmosphere and safety if electrical systems fail completely. Having contingency plans prevents panic and allows you to continue operating during technical difficulties.
Creating Your Signature Lighting Style
As you gain experience with haunted house lighting, develop a signature style that makes your attraction distinctive and memorable.
Studying Professional Haunt Lighting
Visit professional haunted attractions and analyze their lighting choices. What colors dominate? How do they guide traffic? Where do they use darkness versus illumination? Professional haunts invest heavily in lighting design, making them excellent learning resources. Take notes on techniques you could adapt for your own attraction.
Watch horror films cinematically, studying how cinematographers use light to create mood and fear. Classic horror films particularly offer masterclasses in atmospheric lighting with limited technology. Modern films show cutting-edge techniques you might adapt using current affordable equipment.
Developing Thematic Consistency
Establish lighting rules for your haunted house theme and follow them consistently. A gothic Victorian haunt uses different colors, fixture types, and techniques than a post-apocalyptic bunker or alien spaceship. Consistent aesthetic choices create cohesive experiences rather than random assemblages of effects.
Document your lighting philosophy and color palette so you maintain consistency across multiple rooms and seasons. This becomes increasingly important as your haunted house expands over years. Consistency doesn’t mean repetitive; it means purposeful variation within established themes.
Soliciting and Implementing Feedback
Ask visitors what they remember most about your lighting. Which moments frightened them? Which areas felt most atmospheric? Where did they feel lost or confused? This feedback identifies what works exceptionally well and what needs adjustment. Exit surveys, social media posts, or simple conversations as visitors leave provide valuable insights you cannot gain from internal perspective.
Be willing to change approaches that aren’t working even if you’re personally attached to them. Effective haunted house lighting serves visitor experience, not creator ego. If sophisticated techniques fall flat while simple effects succeed, embrace simplicity and invest creativity in refining successful approaches rather than forcing unsuccessful sophisticated alternatives.
Bringing Your Haunted House to Life Through Light
Lighting transforms spaces from ordinary rooms into extraordinary experiences that linger in memory long after Halloween ends. The techniques, equipment, and principles discussed throughout this guide provide comprehensive tools for creating genuinely effective haunted house lighting regardless of your experience level or budget.
Remember that darkness is your most powerful tool. Fight the instinct to illuminate clearly. Embrace shadows, hide details, and leave threats partially revealed. Trust that visitor imagination will create fears more powerful than anything you could explicitly show. Light serves to suggest, hint, and misdirect rather than to fully reveal.
Start with clear goals for each room. What emotion should visitors feel? What should draw their attention? How should they move through the space? Let these answers guide lighting choices rather than randomly placing fixtures and hoping for good results. Intentional lighting design separates professional-feeling attractions from amateur displays.
Invest in quality where it matters and economize intelligently where it doesn’t. A few premium fixtures in key positions deliver better results than many mediocre fixtures scattered throughout. Build your equipment collection gradually, learning and refining your approach as you expand capabilities over multiple seasons.
Most importantly, enjoy the creative process. Lighting design combines technical skill with artistic vision, offering endless opportunities for experimentation and innovation. Every season brings new techniques to try, new equipment to explore, and new ways to frighten and delight visitors. Your haunted house becomes a living artwork that evolves with your growing expertise, creating traditions and memories that make all the effort worthwhile.
The lights dim, shadows gather, and visitors step hesitantly forward into the darkness you’ve crafted. This is where your vision becomes reality, where careful planning translates into racing hearts and breathless excitement. Every beam, every shadow, every carefully placed fixture contributes to experiences people will share with friends and remember for years. That’s the true magic of haunted house lighting—not just creating fear, but creating moments that endure long after the lights come back on.
 Best Halloween Outdoor Lighting Ideas to Transform Your Home Into a Spooky Spectacle
Leave a Reply